 Date and Walnut Bread

Date and Walnut Bread
Ingredients
Ingredients (makes one large loaf or two medium loaves)
225g Strong White Flour (Bread Flour)
225g Wholemeal Flour
275ml / 15fl oz cold water
10g Easy blend yeast
1 tsp sugar
1-2 tsp salt vary to taste
150g Dates
100g Walnuts
Preparation
Preparation Time 20 min, Date and Walnuts soaking 3-4hr,
Dough Proving 2hr plus
Cooking Time 25-30 min (one large loaf) 22-25 min two small loafs
Oven Temperature 230c / 450F / gas mark 8
Method
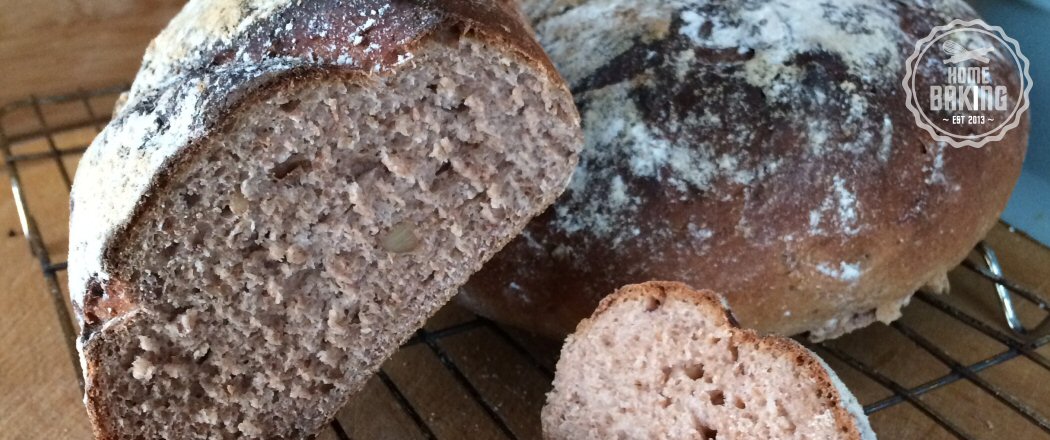
Artisan bread, i.e. bread with added nuts, fruits, berries or spices is becoming quite popular. Rather than think of bread to make sandwiches, think of this type of bread that you might serve with a ploughman’s lunch or bowl of soup not necessarily to make a cheese or a cold meat sandwich. This bread is nice on its own or just buttered and eaten alongside a starter meal or lunch.
The method of making bread is quite simple, just a few Ingredients are needed to make a loaf and experimenting with flours can be fun. My Date and Walnut bread uses two different types of bread flour. A strong white and a wholemeal. You can of cause use only wholemeal or replace this for Rye flour.
Wholemeal and rye flour has less gluten than the white strong flor so the combination of both gives flavour and gluten to give the bread a light texture and rise.
Making the bread
First of all, you need to chop the dates and walnuts into small pieces. A single date to about six to eight pieces depending the size. Chop the walnuts into a similar size and place the chopped dates and walnuts into a small bowl. Add approximately 175ml hot water and leave aside for 3-4 hours or overnight if you wish. This will soften the nuts and inflate the date pieces.
After the dates and walnuts have had time to soften and absorb the water it is time to make the dough. Place in a mixing bowl the strong white and wholemeal flour, dried yeast and salt. Add the water the dates and walnuts were soaking in, into the mixture added approximately a further 100m l cold water. Bring the dough together first with a wooden spoon then your hand. Add the walnuts, dates and if needed slightly more cold water.
Remove the dough from the bowl and knead for approximately 8-10 minutes until the dough looks smooth and then form the dough into a ball.
Place the dough into a large clean bowl and cover with bowl with cling film. If you make bread a lot then a handy it is to buy a plastic shower cap and use this to stretch over the bowl. You can use the cap again and again.
Place the bowl in a warm but not hot place and allow the dough to rise (dough in size). This will take a couple of hours.
Once the dough has risen, take it out of the bowl and knock the dough back! The process of ‘knocking back’ will remove air pockets that can form when the bread bakes. Nobody wants a loaf that once cut reveals large holes in the middle!
Know the bread is ready to be formed.
You can make one large loaf or dived the dough as you please to make two smaller loafs or rolls. My preference is to make two small loafs.
Round loaf.
Use half the dough to make a round loaf. This just requires a further 1 min knead, form the dough into a ball and place it on a baking sheet. Use a very sharp knife of baker’s lamb (dough cutting knife) to cut the top of the bread dough in a cross. Cut a couple move times to help the bread rise and split. By cutting the bread you help the bread form.
Long loaf.
As per the round loaf knead the dough for a further minute, form a dough ball and then roll out to form a standard loaf shape and place on a baking sheet. Again, use a sharp knife or lamb knife to cut the bread, this time across the loaf several times from side to side.
Lightly dust the top of the dough with flour and cover the bread dough lightly with cling film or if you have one a plastic proving bag. And leave the dough to rise for a second time, approximately 30min
Preheat your oven to 230c / 450F / gas mark 8Bake the loaves for 25-30 min (one large loaf) 22-25 min two small loafs
Top Tip: If you like your bread with a nice crust place a metal rimmed tray / shallow metal container in the bottom of the oven and allow this to heat up while the oven is getting to temperature. Place your bread into the oven pour in a quarter of a cup of cold water onto the tray and shut the oven door quickly. The instant steam it generates will give your bread that extra crust. Professional bakery ovens have a feature to add water/stream during this process but the same effect can be achieved at home.

Comments